Although it may seem like an insurmountable obstacle, bubbling plaster walls can be easily repaired. Bubbling happens when the plaster separates from the surface it was applied to, which can happen when there’s too much moisture or not enough adhesion.
This article will give you the lowdown on how to fix bubbling and how to find out what’s causing it. Whether you’re dealing with small blisters or large bubbles, these procedures can help you restore the integrity of your plaster walls with a smooth and durable finish.
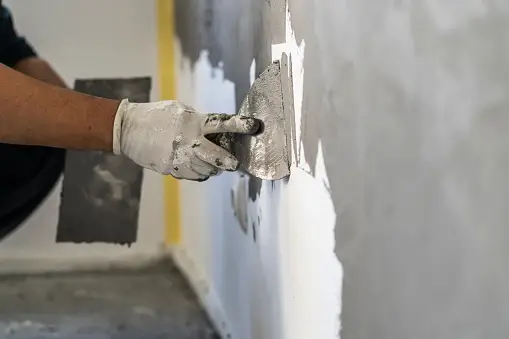
How Do You Fix Bubbling Plaster Walls?
To prevent walls from bubbling in the future, it’s important to address the underlying causes, which typically involve moisture issues or poor adhesion. Here are some steps you can take:
Identify and Fix Water Sources
- Check for Leaks: Inspect plumbing fixtures, pipes, and roof areas for leaks that could be contributing to moisture buildup.
- Improve Ventilation: Ensure adequate ventilation in rooms prone to high humidity, such as bathrooms and kitchens. Consider using exhaust fans or dehumidifiers if necessary.
- Seal Cracks and Gaps: Seal gaps around windows, doors, and other penetrations that could allow moisture to enter.
Prepare Surfaces Properly
- Clean and Dry Surfaces: Before applying plaster or paint, ensure that surfaces are clean, dry, and free of dust and debris.
- Use Suitable Primers and Sealers: Apply appropriate primers or sealers that are designed to improve adhesion and prevent moisture penetration.
Choose the Right Materials
- Quality Plaster and Paint: Use high-quality plaster and paint products that are suitable for the specific conditions of your walls (e.g., moisture-resistant formulations for bathrooms).
Apply Techniques for Better Adhesion
- Use Bonding Agents: When repairing or patching plaster, use bonding agents or primers to improve adhesion between layers.
- Follow Manufacturer Guidelines: Always follow the manufacturer’s instructions for mixing, applying, and curing plaster and paint products.
Monitor and Maintain
- Regular Inspections: Periodically inspect your walls for any signs of bubbling or moisture damage.
- Prompt Repairs: Address any issues promptly to prevent them from worsening and causing more extensive damage.
Consider Professional Help
- If you’re unsure about the underlying causes or if the issue persists despite your efforts, consider consulting a professional contractor or plaster specialist. They can provide expert advice and solutions tailored to your specific situation.
By taking these proactive measures, you can help prevent walls from bubbling and maintain the integrity and appearance of your interior surfaces over time.
How Do I Stop My Walls From Bubbling?
To prevent walls from bubbling in the future, it’s important to address the underlying causes, which typically involve moisture issues or poor adhesion. Here are some steps you can take:
Identify and Fix Water Sources
- Check for Leaks: Inspect plumbing fixtures, pipes, and roof areas for leaks that could be contributing to moisture buildup.
- Improve Ventilation: Ensure adequate ventilation in rooms prone to high humidity, such as bathrooms and kitchens. Consider using exhaust fans or dehumidifiers if necessary.
- Seal Cracks and Gaps: Seal gaps around windows, doors, and other penetrations that could allow moisture to enter.
Prepare Surfaces Properly
- Clean and Dry Surfaces: Before applying plaster or paint, ensure that surfaces are clean, dry, and free of dust and debris.
- Use Suitable Primers and Sealers: Apply appropriate primers or sealers that are designed to improve adhesion and prevent moisture penetration.
Choose the Right Materials
- Quality Plaster and Paint: Use high-quality plaster and paint products that are suitable for the specific conditions of your walls (e.g., moisture-resistant formulations for bathrooms).
Apply Techniques for Better Adhesion:
- Use Bonding Agents: When repairing or patching plaster, use bonding agents or primers to improve adhesion between layers.
- Follow Manufacturer Guidelines: Always follow the manufacturer’s instructions for mixing, applying, and curing plaster and paint products.
Monitor and Maintain
- Regular Inspections: Periodically inspect your walls for any signs of bubbling or moisture damage.
- Prompt Repairs: Address any issues promptly to prevent them from worsening and causing more extensive damage.
Consider Professional Help
- If you’re unsure about the underlying causes or if the issue persists despite your efforts, consider consulting a professional contractor or plaster specialist. They can provide expert advice and solutions tailored to your specific situation.
By taking these proactive measures, you can help prevent walls from bubbling and maintain the integrity and appearance of your interior surfaces over time.
How Do You Flatten Bumpy Plaster?
Flattening bumpy plaster involves several steps to smooth out the surface and achieve a uniform finish. Here’s a detailed guide on how to flatten bumpy plaster walls:
- Assess the Surface: Inspect the plaster wall to identify the areas that are uneven or bumpy. Note the extent of the bumps and whether they are localized or spread across larger areas.
- Gather Materials
- Putty knife or scraper: For removing loose plaster and smoothing.
- Sandpaper: Medium to fine grit for sanding rough areas.
- Joint compound or plaster: For filling in deeper indentations.
- Primer: Suitable for plaster surfaces.
- Paint: To finish the surface.
- Prepare the Area
- Clear the Wall: Remove any furniture, decorations, or obstacles from the wall area you’ll be working on.
- Protect the Floor: Lay down drop cloths or plastic sheeting to catch debris and protect the floor from dust and debris.
- Repair Deep Indentations: Fill Holes and Cracks: Use joint compound or plaster to fill any deeper holes, cracks, or gaps in the plaster. Apply the compound with a putty knife, ensuring it’s smooth and level with the surrounding surface. Let it dry completely according to the manufacturer’s instructions.
- Smooth Out Bumps and High Spots: Scrape the Surface: Use a putty knife or scraper to gently scrape over the bumpy areas, levelling them as much as possible. Remove any loose or flaking plaster.
- Sand the Surface: Sandpaper: Once the repaired areas are dry, use medium to fine-grit sandpaper to smooth the entire surface of the wall. Sand in a circular motion or with light, even strokes, focusing on smoothing out rough spots and blending repaired areas with the surrounding plaster.
- Clean the Surface: Remove Dust: After sanding, wipe down the entire wall with a damp cloth or sponge to remove dust and debris. Allow the wall to dry completely before proceeding.
- Prime the Wall: Apply Primer: Use a primer specifically designed for plaster walls. Primer helps to seal the surface, improve adhesion of the paint, and ensure a uniform finish. Follow the manufacturer’s instructions for application and drying times.
- Paint the Wall: Apply Paint: Once the primer is dry, apply paint using a roller or brush, depending on the size of the wall and your preference. Apply at least two coats of paint for an even finish, allowing each coat to dry completely before applying the next.
- Inspect and Touch Up: Final Inspection: After painting, inspect the wall for any remaining imperfections or areas that may need touch-up. Sand lightly if necessary and apply additional coats of paint as needed to achieve a smooth and uniform appearance.
By following these steps, you can effectively flatten bumpy plaster walls and create a smooth, professional-looking surface in your home or space. Each step is crucial to ensure a durable and aesthetically pleasing finish.
Conclusion
It takes meticulous planning, perseverance, and focus to smooth out uneven plaster walls. You may get a uniform and smooth finish on your plaster walls by following the processes mentioned above: evaluating the surface, collecting the materials, fixing and smoothing out irregularities, sanding, priming, and painting.
Before anything else, make sure the wall surface is free of deep indentations, holes, or cracks by conducting a comprehensive evaluation. Filling these defects successfully requires the use of the right materials, like plaster or joint compound. Following the repair, sand the surface to remove any lumps or rough patches and create a smooth transition between the old and new plaster.
To seal the wall and promote paint adhesion, use a high-quality primer made for plaster surfaces. This will give you a finish that will last. At last, for a professional and visually beautiful finish, apply numerous coats of paint and check for touch-ups during the final inspection.
You may improve the aesthetics of your home by smoothing out uneven plaster walls by following these instructions.